It’s been a while since I’ve pulled out my crochet hooks. There’s no excuse (none!) except life has been busy with friends and work and enjoying all Toronto has to offer.
When our dear friends told us they were expecting their first child, I knew I had to crochet a blanket. There’s no better source (in my opinion) for baby blankets than Daisy Farm Crafts. I shared a few designs with the mom and she picked out this beautiful crochet mixed v-stitch blanket: https://daisyfarmcrafts.com/crochet-mixed-v-stitch-baby-blanket/.
My friends are naming their daughter Violet (love!) so the stripe of violet yarn was a subtle touch to her namesake.
The pattern is mindless and easy – great to work on while watching TV or listening music.
The one thing I struggled with, however, was the border.
The pattern says, “Work one round of DC around the blanket, working 7 DCs for each gray section on the sides and 2 DCs for each color row on the sides.” I followed those instructions and should have checked my tension after the first couple stitches. It was too few stitches per row and I feel like the border ended up pretty tight. I stretched it and think it will be ok, but I wish there was a little more give. Next time, I’ll add a few more stitches around the border to help the blanket lay flat.
We can’t wait to love baby girl Violet and welcome this new life into the world. <3
I’ve been on a blanket kick. Crocheting one for my condo during a long Toronto stay-at-home pandemic, and two for upcoming Grassel babies. My cousin and sister-in-law are due with girls and the blankets became the perfect projects.
I recently came across Daisy Farm Crafts. (And apparently I’m late to the party.) Sharing a few pics with my crochet friends let me know they’d been making Tiffany’s patterns for years. Years!
One browse of her website and you’ll see why.
Colorful, unique, clean, endless options. What’s there not to love?
Two baby blankets-one pink, one gray- of triangles (32 x 36 and 34 x 40 inches)
The black and white afghan I made extra large (54 x 65 inches). I like to think I crochet fast, but even with some speed, I calculated that each “stripe section” – the couple white rows + one black row of each section – took me about an hour to complete.
There are 16 stripes total so probably close to 16-18 hours of solid crocheting. Hey, it was a good activity during the pandemic!
The baby blankets are close in size, but a hook change and different yarn caused the gray one to be slightly bigger. The pink/white one measures 32 x 36, while the gray/white one is 34 x 40 inches.
But how cute are those triangles?
They’re actually worked by carrying the white yarn throughout the rows. Less ends to weave in at the end, but sometimes it felt silly to carry white yarn across 9 gray stitches, just hoping it wouldn’t show through.
The white yarn does peak out every so often, but it’s barely noticeable (and I’m hoping the kids won’t notice).
There’s nothing better than a handmade gift. It’s personalized, thoughtful and often cheaper than buying from a store. Christmas is the perfect time to delve into your stash and whip up a gift–or two!–for the special people in your life.
I picked these six projects because they’re great last-minute gifts. Some work up in less than an hour and none take longer than a few hours to knit or crochet. Most are also one-skein projects.
Free Patterns clockwise, starting from top left corner:
Canvas Crochet Hat + Flower – Works up in just 10 rounds, single skein project. I make this one on repeat all year.
Infinity Knit Cowl – Knit on big needles, textured and works up quickly. 1.5 skein project, only knitted project in the group.
Baby Crochet Hats – Great for beginners! Uses 50 yards and works up in less than an hour. Can be made with or without a rolled brim. Play around with colors and stripes to make hats for boy or girls.
Short Crocheted Infinity Cowl – Wraps once around your neck for all the warmth without the bulk. One skein project and easy for beginners, would be great for a teacher or coworker.
Each project (except the baby hats) use Lion Brand Wool-Ease Thick & Quick. If you read my blog, you know it’s some of my favvvorite yarn. Squishy, thick and comes in rich hues. Every Black Friday, my sister and I trek to Michael’s and buy no fewer than 50 skeins – enough to last the winter… and then some.
If you don’t have Super Bulky (6 weight) yarn, you could always use two strands of worsted weight held together and see if that gives you the right thickness. Then again, it’s Christmas so it’s ok to splurge on nice yarn. You’re investing lots of time into making hand-knit or hand-crocheted gifts and your friends and family deserve the best!
Do you have go-to projects when you need a quick gift? Share your last-minute crochet and knit gift patterns in the comments. I’d love to see what you’re working up this year.
This Canvas crochet hat takes 100 yards of yarn and can be worked up in less than an hour.
It’s perfect for those last minute gifts or instant gratification projects.
The pattern is named “Canvas” because it’s my tried-and-true, go-to crochet hat pattern! I use it as the base for a lot of projects, choosing to add a brim, flower, or pop of color to create a different look each time.
For a men’s hat, simply leave off the flower and you’ve got a nice basic hat for your man.
Play around with the gauge, sizing and style to create your own canvas hat pattern.
Round 1: Ch 2 (counts as first dc). Work 11 more dc into ring. (12 dc)
Round 2: Ch 2, dc in same stitch. Work 2 dc into each stitch around. (24 dc).
Circle should measure 4″ in diameter. Check gauge. If hat is too small, use a J or L sized crochet hook. Don’t be afraid to go up a size or two – the yarn is big and bulky so it can handle it!
Round 3: Ch 2. Work 1 dc into same stitch. Work *1 dc into next stitch, 2 dc in next stitch. * Repeat around. Join with sl st. (36 dc)
Rounds 4 – 10: Ch 2. Work 1 dc into each stitch around. (36 dc)
Fasten off, weave in ends.
Note: If hat is too small, add 2-3 stitches in Round 4 by increasing every 9 stitches. Try on your hat to make sure it fits your head!
Flower Directions
Chain 3. Join with sl st to form ring.
Round 1: Ch 2 (counts as first dc). Work 1 dc into ring. Repeat *Ch 3, 2 dc into ring* until five, chain-3 loops are made. Sl st in first chain-3 loop to join.
Round 2: Into each chain-3 space work: *1 sc, 5 dc, 1 sc*. Work petal repeat into each chain-3 space around, skipping dc stitches. 5 Petals.
Leave a long tail, fasten off. Sew onto left side of hat.
Does that title work? Is it cute? Do you get it? Ha!
Maybe it’s because I’ve rarely left my condo (three times since March 15) or because the world’s standing still and we’re all going a little crazy over Tiger Kings and herd immunity. What is time! Nothing matters!
And yet, somehow, everything matters?
My days might look a lot like your days. I wake up, thankful I can work from home. Make a french press, make breakfast, do dishes from the night before.
Plop down on my pink velvet couch, fully knowing my back will hurt by lunch, and open my Mac for a day of digital marketing. I love my job and am grateful to work with an amazing team of humans who are creative, resilient and supportive.
Most days, I put on a shirt and curl the front half of my hair. Yes, just the front. I even put on makeup (though don’t use the good stuff, just that weird makeup that’s been in my bathroom for months and I’ve deemed ‘good enough for video calls’).
The morning sun breaks into my living room for a blinding half hour at 9:30. Some mornings, I scooch my plant over so it can enjoy the sun a little longer.
I haven’t been crocheting much and only knit once. Look – I made a hat!
Whatever your situation and your state – mental, physical, emotional or spiritual – I hope you’re finding peace and hope in these days.
Maybe you’ve decided to make knitting or crocheting your quarantine hobby. Welcome! You’re in good company. Here are some crochet and knitting blogs to browse:
I moved to Toronto 10 months ago and it’s been interesting watching events unfold from North of the border. The differences between Canada and the US have never been so stark and contrasting. First celcius, now this!
Cheers, friends, to another few weeks… another few months… or however long we’re here together. I’m grateful for your comments, your emails and your thoughts. <3
Foundation chain 26 + 1. A foundation chain will make your base chain stretchy. If that’s too adventurous, just do a regular Chain 26 + 1. Turn.
Row 1: Work 1 sc in each stitch across. Ch 1, turn. (26 stitches)
Row 2: Work 1 sc in back loops only of each stitch across. (26 stitches)
Repeat Row 2, working in back loops only of each row, until you have a rectangle 16 inches long.
Your rectangle should measure 11 inches tall by 16 inches wide.
Fold rectangle in half so short ends line up and ‘ridges’ are vertical. Join ends by working 1 sc into each stitch across to stitch the two ends together. 26 stitches.
Fasten off, leaving a long tail of yarn (about 8 inches).
With a darning needle, loosely thread yarn all around the open end. 12 or so big stitches. Pull tight, closing the hole like a drawstring to form the top of the hat.
If you’d like a smaller brim, make fewer than 26 chains at the beginning. The great part about this hat is that you can try it on before you end off to make sure it’s just the right size.
Make your own? I’d love to see your version in the comments!
Got out the chunky yarn and crochet hooks this weekend. Whipped up this quick little guy.
I didn’t write a pattern down, but can if there is interest!
A few moths ago, I remember seeing this stitch – I think it was used in a hat or a scarf. It’s worked similar to a shell stitch except you do this weird, yarn-over/wrap around thing that covered the top parts of stitches.
If ever there is a pattern, a video will be accompanying it, ha, don’t worry.
Materials:
1 skein Lion Brand Wool Ease Thick & Quick
Size K crochet hook
Hat is worked from the bottom up. I started with a brim of 6 HDC in back-loops only short rows. Then I crocheted 4 rounds (yes, only 4!) in the shell wrap-around stitch, decreasing in certain intervals.
The hat crochets up quickly. Would also look cute with a pop up-top. I like how the variegated yarn looks in the tall, swoopy shell wrap-around stitches.
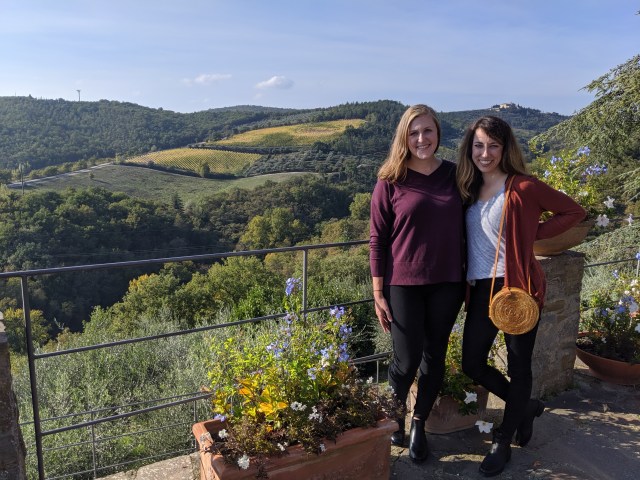
Once every year or so I plan a big trip with Best Friend Kaity Kline. We’ve gone road tripping down the California coast, penguin spotting in Argentina and decided it was time for us to go to Italy.
Kaity’s had Italy on her list so when we saw $500, round-trip flights on Scott’s Cheap Flights, we pulled the trigger. Into Naples, out of Florence. The details we’d figure out later.
This post is not another influencer post on how to “do Italy in 2 week” with comp’d hotels and private drivers. This is a travel post for gals in their 30’s who want to travel like normal human beings, but still enjoy the finer things of life.
We learned when to pay 15 euro to have our bags delivered by a porter and when a cheap bus ticket was the best option. A fine line between splurging and savings.
Kaity is a planner and a foodie so MAJOR kudos go to her for finding the best places.
Here’s a brief itinerary and helpful tips we picked up along the way. We called it the trip of a lifetime, but you be the judge.
Quick Itinerary Summary
Flew into Naples, spent one night there.
Day trip via train to Pompeii on our way to Sorrento
Ferry to Positano, 3 days there. Boat trip to Capri + beach time.
Bus to Sorrento, then train to Rome.
3 days in Rome – our favorite city! Vespa tour, Colosseum, Roman Forum, Palatine Hill, Vatican Museums, St. Peter’s Basilica, dome climb.
Train to Florence, rental car to drive to Tuscany/Montepulciano.
3 days in Tuscany – Wine tastings, relaxing and hot springs.
Drove back to Florence – 3 days there. Free walking tour, Uffizi Museum, Galleria, cooking class, Dumo climb.
Forece to Home
Travel Tips & Tricks for Italy
Get a travel pass ($10/day) for your cell phone so you have service
The best, most authentic restaurants are named for their founders. Da Tonino, da Enzo, etc.
Always get the house wine
Tuscan bread is bland since there’s no salt! Legend says it’s because of a long-time rivalry with Pisa
Sidewalks are uneven, a 15 minute walk with your rollerbag doesn’t sound bad, but it might be worth a cheap taxi to get to your hotel
While food anywhere in Italy is great, read reviews before sitting down. We avoided bad places a few times when looking for a quick meal.
Florence is known for its leather, Sorrento for its sandals
Italy is a no tipping culture
Make sure you watch Lizzie MacGuire & When in Rome before or during your trip for a truly immersive experience
All the Details: Italia 2019
Day 1 – Flew into Naples. Pizza at L’Antica Pizzeria da Michele. The “best pizza in the world” of Julia Robert’s Eat, Pray, Love fame. We went at 5pm and waited 5 minutes for a table. Heard others who went later that day waited 1 to 2 hours. 5 euro for a pizza (2 options to choose from) and beer or Coke. Best pizza of our trip.
We didn’t love-love Naples and were only there a few hours. Spent the evening catching up on sleep and fighting jet-lag.
Day 2 – Train to Pompeii, then onto Sorrento. A 45 minute train ride from Naples to Pompeii via the Circumvesuviana train from the Naples Centrale station to Pompeii Scavi station. Trains depart every half hour. Bought tickets at the station.
Pompeii is literally right next to the train station. 5 min walk. We chose to store our bags at the train station for 4 euros/bag. Pompeii has free bag storage on a first-come, first-serve basis and probably should have done that. Also bought an unofficial walking tour from the train station. Regrets. Buy a walking tour from the park (8 euros) or go with a tour group.
We spent about 3 hours walking around and exploring areas of the city. Fun to get lost and explore crevices and old brothels in the shadow of Mt. Vesuvius. We had a quick lunch at the Pompeii cafe in the park before heading back to the train station. Opted for the commuter train, should have paid more for the express train to Sorrento. Trains were crowded and delayed, but was a truly local experience.
In Sorrento, we stayed at Hotel Regina. For dinner we walked to Bagni Delfina. Lovely seafood restaurant on the water. Delicious pasta and house wine and amazing views of Sorrento to get there on little footpaths. We called for reseservations ad got there right as they opened.
The quaint little town of Sorrento is known for its sandals. Kaity bought an adorable pair of flip flops and we both got matching straw bags at the market. Cute little town to walk around and sample limoncello.
Day 3 – Took the ferry from Sorrento to Positano. 15 euros/person and took about an hour. Before we left, had lunch by the water and by the ferry depot at Ristorante Bar Ruccio. There’s an elevator from the top of Sorrento to the water for a few euros. We walked down the first time to get ferry tickets, then bought tickets for when we had our bags.
When arriving in Positano, we planned to walk to our Air BnB. Thankfully there were guys at the ferry depot in blue shirts shouting, “70 steps to the top, log walk”. We later realized they were ANGELS. The Positano Porters would deliver our suitcases for 15 euro/bag to our place. We hadn’t planned on using them, but my goodness, we would have paid double. Turns out it was 200 steps to our place and we would have probably actually died if we did it ourselves. For us normal people who aren’t staying in 5-star resorts, pay to have your bags delivered.
Days 4 & 5 – Positano. Positano is everything you’ve heard. Beautiful, one million steps everywhere and overpriced. But dang, it’s worth it. This part of our trip was everything beach, sun and water-related.
Private boat tour around Capri – Gianni’s Boats. 180 euros cash for 4 hours for the 4 of us. We ferried from Positano to Capri (20 euro/person; 40 mins) where we met our captain, Luca. BYOB.
Luca toured us around stunning grottos where we could swim in the Mediterranean.
We went to the Blue Grotto because you have to when you’re that close. Lots of tour boats waiting to get in. We somehow cut the line and paid the 14 euro entrance fee + a hefty tip to the row boat that let us go in ahead of others. Fine and you have to do it, but wouldn’t recommend if you’re tight on time since there are so many other beautiful grottos and places to boat. One of our favorite excursions. You truly feel like queens.
Restaurant La Tagliata – Recommended by a few friends and totally worth it! Set menu of 45 euros/person since “we’re all family here”. 6 courses of food that just kept coming – veggies, meat plates, pastas, desserts and unlimited wine. Made a reservation in advance and they picked us up at a hotel in town. 25 minute ride to the restaurant up the hill to a quiet little enclave outside of downtown.
Beach Chairs + Umbrellas – We’d had every intention of hiking the Path of the Gods, but instead opted to rent beach chairs and an umbrella and spent the day sipping pina coladas and reading. 20 euros/person for front-row seats (17 euro for second row). You’re in Positano, get the front row.
Day 6 – Bus to Sorrento, then train to Rome. Big travel day to get up to Rome. Took the SITA bus from Positano to Sorrento. Bought bus tickets at the Tobacci shop at the top of the hill in Positano for a few euros. Sat with the locals on the 45 minute, turny ride. Convinced my best friend not to throw up.
Once in Sorrento, we took the Circumvesuviana train from Sorrento to the Naples Centrale station (trains depart every half hour). Lovely trains with reserved seats. Bought our tickets a few days before at the train station when we first arrived in Sorreto.
Private Vespa Tour in Rome – Another one of our favorite activities that we splurged on. Referred to Valerio of Dearoma Tours from a coworker.
Booked a 3 hour vespa tour of Rome and got to feel like a local while seeing more remote spots of the city. Great intro on our first day!
For hotels in Rome, we stayed at a boutique near the Trevi Fountain. Great location, good price and central to most things. The Trevi Fountain was always, always crowded. We liked going there best at night when it was all lit up. Don’t forget to throw a coin (or two or three!) into the water.
Days 7 & 8 – Rome
Rome was our favorite city and we’re so glad we booked three days there. It’s historic and beautiful and larger than life. Something ancient on literally every corner, you can turn around and see something new. No joke, we accidentally walked by the Pantheon one night – oh surprise! Look at that.
We booked two big tours in Rome: one to see the Colosseum and one to see the Vatican.
For the Colosseum we booked a “skip the, skip the line tour” through Viator. There’s a 3,000 person capacity for the Colosseum and our 7-person group walked right past people who had been standing in line for hours.
One thousand percent worth it, especially because of our fantastic tour guide, Erturk. He also does private tours around Rome – highly recommend! He was our favorite guide of our trip. The afternoon Viator tour included the Roman Forum and Palatine Hill. (Morning tours went to see the Pantheon which we were disappointed at first to miss, but Palatine Hill was so much cooler).
We also booked a skip the line tour for the Vatican Museums, Sistine Chapel and St. Peters Basilica. Worth doing since you’re there, but not one of our highlights. The tour group let us walk right in without waiting, but the place was crowded, despite our tour guide being pleased how un-crowded it was.
It was cool to see the School of Athens and the Sistine Chapel ceiling. We weren’t that into St. Peter’s Cathedral. We climbed the cathedral Dome (8 euros to climb the stairs). Tight little steps that start to slant when you get to the top. Great views of Rome and worth the exertion.
Kaity found a cool pizza place a 20 min walk from the Vatican that had traditional square Roman-style pizza called Pizzarium. Place wasn’t crowded when we got there at 4pm, but we could only imagine how busy it would get. They cut pizza by the slice with scissors and weigh it. Very rushed ordering, but got to enjoy it at the standing counters outside.
We walked around the Spanish Steps and Borghese Gardens on our own. The Orange Garden is serene and has great views of the Vatican.
For food in Rome, our vespa guide gave us a hot tip: the best, most traditional restaurants in Rome have their owner’s name. We ate at da Enzo and da Tonino, both excellent. We loved da Tonino – cheap, delicious pasta in the Trastevere district. No reservation, went at 8pm and got a table in 5 mins. The Trastevere was a quieter neighborhood with local places. Da Enzo only takes reservations for 7:30. We couldn’t get one so lined up with the rest of the peasants and waited 90 mins for a table. There were 3 parties seated at our table and it was tight and busy, but food was good.
Days 9, 10 & 11 – Train to Florence, rented a car and drove to Tuscany. From Rome, we hoped back on the train and went to Florence. We walked 5 mins from the train station to the Hertz to get our rental car. We also met back up with our two friends and the four of us piled in and headed for wine.
Tour & Wine Tasting at Castello di Verrazzano – We visited this rustic winery from the 16th Century. Bigger production, but the best dang balsamic we had. Planned to bring some home before we saw the 48 euro/3 ounce price tag.
Had a tour, tasting and light lunch at Capannelle. One of our tour highlights! Staff was lovely, place was small, quiet and remote. We had the entire space to ourselves. Juliana, the 75-year old Italian cook, made us one of the best meals we had. Pastas, leek souffles and desserts to die for. Wine was also good. Reservations required, highly, highly recommend for a top-tier experience. 50 euro/person.
We stayed in a very remote villa in Montepulciano we booked through Air BnB. Lots of steep hills and blind turns to get there.
One day, we booked a wine tour through Tours of Tuscany Montepulciano/Montalcino. They picked us up at 9am and our party of four joined two others as we visited 3 wineries and had lunch. They dropped us back at our Air BnB around 4:30pm.
Motepulciano is know for “vino nobile”, a delicious, medium-bodied red wine made from Sangiovese grapes. loyal red drinkers, Kaity and I were in heaven.
Had dinner at Ristorante la Grotta and one of our favorites! Classy/casual place – welcome wine + appetizers from the kitchen. Homemade pastas and delicious wines. Made a reservation the day before, but you may be able to walk in if you get there early enough.
Kaity and I had an extra day in Tuscany. We slept in til noon, then went to the Gattavecchi Winery in Montepulciano for lunch and a tasting. Love, love! Ate on the terrace and enjoyed the best service and perfectly made pasta. Got the potatoes with cheese and regret nothing. Ended up buying a bottle there, the place was so darling and welcoming.
That evening, we drove to the hot springs, Bagni San Filippo. You park on the side of the road and hike maybe 10 minutes until you find an open spring. It was dark when we were there so we were hilariously stumbling over everything. Almost sat down in a lukewarm pool before we found truly hot, shallow water and shared a space with a German couple. Hug out maybe an hour before we were done and tired of smelling like sulfur.
Driving in Florence, Montepulciano and Tuscany was no joke. It was quick and tight and you’re surrounded by sneaky vespas! Kaity got her international driver’s license through AAA so we kept it legal.
Days 12, 13 and 14 – Drove from Tuscany to Florence. Woke up and made the 2 hour drive back to the city. Stayed in a darling Air BnB 3 minutes away from the Ponte Veccio and the downtown area.
Did one of our favorite things to do and booked a free walking tour of Florence at 10:30am on Day 1. We’re a fan of Reign (the Mary Queen of Scots teen drama) and were enamored with the de Medic family and how they influenced the city.
Tour-wise, we hit the Uffizi and Galleria dell’Accademia, booking normal tickets on the museum websites for both. The Uffizi we walked through in about 1.5 hours and the Galleria we spent 20 minutes in since it was built solely to house Michelangelo’s David.
We reserved tickets ahead of time online to climb up the dome of the Duomo, one of the most unique buildings we saw. Tickets sell out so reserve your spot before you go.
Our tickets to climb the dome also got us into the museums where the original Gates of Paradise are. Very cool to see the bronze doors.
We took cooking classes and made pasta and tiramisu after having a market tour. Very fun, especially since we met some cool people and the wine was flowing very liberally.
At the market, we got to sample cheeses, meats and chutney and some of the best sweet hot pepper jam.
Diner highlight in Florence was 4 Leoni – I splurged and got the bistecca Fiorentina, the famously huge steak from Florence. Cuts start at 55 euro for 1 kilo. *gulp*. Kaity had the best eggplant parm of her life.
The best gelato in Florence we found at Sbrino. All locally made and delicious sorbets, too. Tip from our tour guide from the walking tour.
He also told us to try lampredotto, which is a traditional Florentine dish made from a cow’s stomach.
Kaity and I could’t stomach the stomach and nearly threw up. I repeat, do not try lampredotto.
From Florence, we took a taxi to the airport where we had 20 long hours of traveling ahead of us. Italy, you were bellissima. Thank you for delicious food, savory wine and too many memories (some of which we’ll never share). We will be back!
With fall around the corner, how can you *not* make crochet pumpkins? Work them up in a velvet yarn and you’ve got yourself an adorable autumn decoration.
Tissue to stuff it (instead of fiberfill – desperate times!)
The crochet pattern for the pumpkin is very simple. It’s a large rectangle.
Once you make a rectangle, stitch the short ends together. You’ll have a tube. To make the pumpkin, you whip stitch both ends together and pull tightly.
The secret to making it look like a pumpkin is how you end it off. After you sew both ends and pull the yarn tight, you finish it by pulling the thread from one side the entire way through to the other side. From the top center of the pumpkin to the bottom. Then fasten off. This gives the pumpkin a “pucker” at the top.
Chain 15 or 16. Work rows of sl sts (back loops only). Sew together and finish off. Make the stems by working 3-4 chairs and sc in each stitch back. Little nub looks cute!
Enjoy these crochet pumpkins! Make the pattern with velvet or normal, worsted weight yarn. Pick a look that matches your place and color scheme. Either way, you can’t go wrong. Enjoy.
On April 17th, I received an email from my boss about a job in our Canadian office. “It’s an opportunity that we should discuss,” he said.
And discuss we did. What would it look like for me to relocate from Pittsburgh–the city where I grew up, where my friends are, where I go to church, where my mom, dad, brother, sister, nephew, aunts, uncles, cousins live–and move to Toronto, Ontario?
Beyond a new currency and figuring out the metric system, it would mean picking up and moving to a new country where I knew only my coworkers. The job itself was appealing – a role where I could build out a team and grow an arm of our digital marketing services. I couldn’t find a reason not to do it. I love new things and it sounded like an adventure.
On April 26th, the eve of my 30th Birthday, I sent this message to my soon-to-be-ex-boss, “I think we’re doing this!”
And do this we did.
I signed the papers, quit my commitments, said my goodbyes and moved to Toronto, Ontario on June 28th, 2019.
I gave away furniture, clothes, dishes and random items to friends that just wouldn’t fit into my new Canadian lifestyle (or the Uhual). I met friends for going away happy hours, dinners, breakfast and Target runs. My mother cried for days. Happy tears and sad tears; tears that I knew meant she would miss me.
It’s now September and I’ve been in Toronto for 2.5 months. My high-rise, 1 bed + 1 den apartment is 95% furnished (pink velvet couch included). I’ll post pics soon.
I’m making friends, finding a good church and discovering the benefits of having a fully-loaded Presto card. My commute to work consists of a 17 minute walk (with one right turn). I rarely take my car out from the underground garage and will probably sell it soon. I now buy shoes based on their comfort level and walkability since I walk close to a hour each day.
The move also gave me something I haven’t had in a long time: space. Space to think, space to be alone, space to wander. Any friend will tell you the 2-week waiting planning period required for my schedule in Pittsburgh. Now, there’s flexibility for happy hour to go extra long or to pop into breakfast with a coworker because I’m in the neighbourhood. I’ve got to tell you, this freedom – it’s intoxicating.
My Canadian coworkers here have been nothing but welcoming. We work together, sample cocktails together, eat tacos after work and go to the beach. It’s week 2 of rec league volleyball and our team is thriving.
One downside to moving across borders and downsizing to live in the 4th largest city in North America is you’ve got to be selective about your belongings. My bins (and bins and bins) of yarn was a “phase 2” delivery and so I moved here relatively empty handed. Yes, this is a confession: I have’t crocheted in 2.5 months.
And so that’s it. That’s the big news in JJCrochet’s world right now. After living in Pittsburgh for 30 minus 2 years of my life, I’ve moved to Toronto. If anyone is interested in applying for a 3-year work visa, moving to Canada or the details of universal healthcare, I’m now an expert. Send me an email.
I have my hooks and needles, of course, but there wasn’t room for yarn. Before I left, I made a large drop-off of yarn to the library and my old knitting group (The Knotty Knitters) who I’ve no doubt will put the skeins to good use.
The weather here in Toronto has turned cooler in the mornings and evenings; autumn is almost here.
It’s Saturday morning and I woke up with the thought that today I would blog and make a trip to a yarn store. Space. It’s a wonderful, freeing, empowering feeling.
This easy baby crochet hat takes 50 yards of yarn and can be worked up in less than 30 minutes. I wanted something quick and easy that I could make while watching Netflix. (We’ve all been there on a Friday night, no?)
Grab the small ball of yarn that’s been in your stash and give it purpose.
This baby hat uses basic stitches and is crocheted in just 9 rows. Yes, seriously – that’s it! Let’s go!
Baby Crochet Hat Pattern
Materials:
Size G (4.25mm) crochet hook
50 yards medium weight yarn (I used Vanna’s Choice)
Size:
Hat will fit a newborn-ish baby. Not a fresh-out-of-the-mama baby, but the type of baby you see when you’re finally able to visit your friend and her 1 month old baby. 🙂
Hat is 5.5 inches wide, 4.5 inches tall.
To make a smaller or larger hat, size up or down with your hook. I think using a size F hook would make a “newborn-newborn” size hat.
Directions:
Round 1: Chain 3. Do not join into ring. Skip 2 chain and work 9 DC into the next chain (the first chain you made, further away from your hook). Join with sl st. (10 DC)
Round 2: Ch 2 (counts as first DC). DC into same stitch. Work 2 DC in each stitch around. Join with sl st. (20 DC)
Round 3: Ch 2. DC into same stitch. Work *1 DC into next stitch, 2 DC in next stitch. * Repeat around. Join with sl st. (30 DC)
Round 4: Ch 2. DC into same stitch. Work *1 DC in each of next 3 stitches, 2 DC in next stitch * Repeat around. Join with sl st. (38 DC)
Rounds 5-8: Ch 2. Work 1 DC in each stitch around. Join with sl st. (38 DC)
Round 9: Ch 1 (counts as first SC). Work 1 SC in each stitch around. (38 SC). Fasten off.
For a hat with a roll-up brim: Work pattern as written, but repeat Round 5 for Rounds 5-11, followed by a Round 9 (which is your new Round 12). If you’d like a longer hat, simply work more rows.
Have you ever found a stitch so beautiful, you have to try it? No project in mind, no yarn bought for the occasion, yet you’re intrigued by its simplicity.
It’s worked by doing increases and decreases for alternating rows. The first (and every odd) row, you work 3DC in a stitch. The second (and every even) row, you DC3tog. There’s a chain-2 between each increase of decrease cluster.
I chose to work it up with a slightly larger crochet hook than the worsted weight calls for to make the stitches a little more defined and stretchy. I think this would make a fantastic base for a crocheted baby blanket.
Simple, yet interesting enough to look different.
I had fun working up these couple rows, though I know it’s not going to be fun weaving in all these ends. Thinking maybe I’ll carry the yarn up each two rows, then work a border around the edge to avoid having to sew ends in every two rows.
You can find more details on the pattern and some great pictures on Daisy Farm Crafts blog.