I have a friend who has a friend who has a coworker who works at an energy company.
When I found this out, my first question was, “So tell me, is it better to keep my apartment cold while I’m at work, then crank it 10 degrees when I get home or should I keep it moderately warm during the day?” He told me it’s better to keep it cold, then warm it up.
Which means my apartment is a cool 53 degrees when I’m gone. I bump it up to 64 when I get home from work, but it’s a little frigid, brr. I keep whatever crochet project I’m working on in a basket in my living room so while my place warms up, I’ll work a few rows (and keep my hat on because again, brr).
My friends call me cheap for living in the cold, I call them fools for heating rooms when they’re not home. Since my apartment is over 100 years old, I’m always looking for ways to save a few bucks while staying warm.
When Duke Energy asked me to partner with them on an energy saving video, I was thrilled. I love saving money on my electric bill and of course, I love crocheting.
On a cold January evening, I literally packed a suitcase full of yarn (there wasn’t much room for anything else!), interspersed crochet hooks in my luggage in case TSA confiscated them (they didn’t, by the way – crochet hooks are fine to take on airplanes) and headed off to Boston.
The following morning, I found myself in Foxboro, Massachusetts working on an energy video and speed crocheting.
To prep for the shoot, I made three things:
A chunky teal & green sweater (6 hours)
A pair of mittens (20 mins)
A draft door stopper (1 hour)
If you follow my blog, you know I like to stick to my hat-making so it was a treat to branch out and try new projects.
Making the video was SO MUCH FUN! We kept quoting the scene from Arrested Development where Lindsay and Tobias say, “…Cause then you have it,” when debating whether or not to take a particular shot. The team was incredible to work with and it was a full day for everyone. So much yarn everywhere.
Ironically, while we were making this video on how to winter-proof your home, Boston got slammed with the infamous Bombcyclone. This meant my flight the following morning was cancelled as feet of snow covered the city. I was stuck in my hotel room… with my crochet hooks… and tons of yarn… and a bottle of wine. I mean, I can think of worse ways to spend a Friday. J
I also got to do a little how-to video of working a front post double crochet. This is a stitch that works up nice and textured. It’s pretty similar to a double rochet, just worked around a stitch instead of in the top loops.
How to Make a Front Post Double Crochet
Pattern is worked across an odd number of stitches in the round. You can use any size hook and yarn, suitable for your project. I used worsted weight yarn and a size H hook.
Chain 10 + 2 (counts as first double crochet).
Rounds 1: Double crochet in each stitch across (11 double crochet). Turn work.
Rounds 2: Chain 2 (counts as first double crochet). Work front post double crochet into next stitch. Double crochet into next stitch. Repeat pattern across row, ending with a double crochet. (11 stitches). Turn work.
Rounds 3: Chain 2. Work double crochet into next stitch. Front post double crochet into next stitch. Repeat pattern across row, ending with two double crochet. (11 stitches). Turn work.
Repeat Rounds 2-3 for desired length.
I’m so thankful I got the chance to meet and work with some great people, sharing the craft I love and learning how to cut down on my heating bill.
I’ve been crocheting and knitting so many hats it was hard to find pom-poms to top them all. I figured there HAD to be an easy and cheap way to make them myself. (Especially since each pre-made pom I was buying was close to $4!)
After reading a few blogs and trying different methods (circle vs. square), I found the best way to make faux fur pom-poms. 3 yards of faux fur later and it’s pom EVERYTHING.
Watch this one minute video to learn how to make a faux-fur pom yourself!
Materials:
6.5 inches faux fur (I purchased mine from JoAnn Fabric)
Polyfill (small handful)
Yarn (15 inches)
Big needle
Scissors
How to Make a Faux Fur Pom-Pom:
Cut 6.5 inch circle from faux fur. (Tip: Cutting is easiest fur-side down. Pull ends gently to remove extra “fluff”.)
Thread 15 inches yarn onto large needle.
Sew big, 1 inch stitches around circle.
Pull ends to form dome.
Fill with polyfill. Pull ends of yarn as tight as you can.
I’ve got a confession. I recently purchased 2.65 miles (????!!) of my favorite yarn, Lionbrand Wool-Ease Thick & Quick. I found “bonus pack” skeins from Michael’s and picked up oh, just a couple… It was too good of a sale to pass up!
I knew with all this yarn, I had to come up with a classic crochet pattern I’d like. Something that was quick to make, had texture and I wouldn’t get bored crocheting. And so after a few frogggings, the snowbird hat was born.
The hat is crocheted from the brim up. It uses half-herringbone double crochet and relies on decreasing to shape the top. It’s probably not good for beginners, but if you’ve been crocheting and are familiar with a few stitches and typical hat construction, give it a try!
Materials
85 yards of chunky yarn – I used Lionbrand Wool-Ease Thick & Quick in Fisherman (1 skein)
Size K (6.5mm) crochet hook
Abbreviations & Special Stitches
HDC – half double crochet. Yarn over, insert hook into stitch. Yarn over, pull through one. Yarn over, pull through 3 loops.
HHDC – half herringbone double crochet. Yarn over, insert hook into stitch. yarn over, pull through 2 loops. Yarn over, pull through 2 loops.
SC2TOG – single crochet two together. Worked across two stitches: insert hook into first stitch, yarn over, pull through one. Insert hook into second stitch, yarn over, pull through one. Yarn over, pull through 3 loops.
Directions
Brim is worked by making a long, skinny band.
To begin the brim:
Chain 5 + 2 (counts as first HDC). Work 1HDC into each of 5 stitches across. [6 HDC]
Row 2 – 26: Ch 2 (counts as first HDC), turn. Working in back loops only, HDC into each stitch across. [6 HDC). This will give it a textured “ribbed” look.
Slip stitch short ends together. This is the brim of your hat!
To begin the hat body:
Hat is worked in the round, do not turn between Rounds.
Round 1: Chain 2 (counts as first HHDC, half herringbone double crochet). Working across long side of brim, work 39 HHDC. Join with slip stitch to top of chain 2. [40 HHDC]
Rounds 2 – 5: Chain 2, work HHDC in each stitch around. Join with slip stitch to top of chain 2. [40 HHDC]
Round 6: Chain 2, work 7 HHDC. *SC2TOG, 8 HHDC*. Work from * to * around for 5 decreases. Join with slip stitch to top of chain 2. [35 HHDC] Note: HHDC stitches are the same height as SC so while it feels odd to use SC as a decrease next to HHDC, it will look ok!
Rounds 7 – 9: Chain 2, work 4 HHDC. *SC2tog, 5 HHDC*. Work from * to * around. Join with slip stitch to top of chain 2.
Round 10: Chain 2, work one SC. *SC2tog, 2 HHDC*. Work from * to * around. Join with slip stitch to top of chain 2.
Round 11: To tightly close top of hat, work one slip stitch into every other stitch around.
Repeat Round 11 again if needed. About 5 stitches should be remaining.
Fasten off, leaving long tail. Sew top of hat closed. Attach a pom or leave plain – whatever you’d like!
As you know, I’ve been knitting pom-pom hats like there’s no tomorrow. Big ones, small ones neutral and colorful. There was just one missing piece. Something that would make the hats more “finished” and professional.
Browsing other knitter’s and crocheter’s accounts on Instagram led me to All That Wood, a custom shop on Etsy that offers engraved tags in all shapes and sizes. Just what I wanted!
And they’re PERFECT. They’re 0.5 x 1 Inch and I ordered 40 in cherry.
Ana was great and helped me find the right looking text for the tags. If you’re selling your hand-made goods or just giving them to friends, I’d highly recommend your DIY game by getting professionally made tags. They’re a great way to brand your company, do some word-of-mouth-marketing and they’re so stinking cute.
As mentioned in the post below, cable knit hats have been my jam recently. I’ll wake up before work and knit a few rows. I’ll pull out the needles before going to bed. I’ve even skipped the gym (more than once) because I just had to finish a cable.
We’ve all been there, right?
Knitting, however, is not my first love.
As the name JJCrochet suggests, my heart belongs to the knotty loops of the crochet world. But there’s something about these chunky hats with pom-poms that have pulled me deeper and deeper into the world of two needles.
I think the thing I like most about these chunky knit cable hats is they take me a while to make. Not too-too long since I’m still using chunky yarn, but each hat takes about 90ish minutes to finish. Compare that to my normal pace of 20-30 mins for a crochet hat and you could call them an invested labor of love.
Which means I care a little bit more and have spent time finding the perfect yarn, the perfect pom-poms (Pat Catans!) and the perfect tags (Etsy). Instead of just a hat, it’s a blended component of things I’ve hunted down. Sure, the cost to make each hat goes up (the pom-poms run me about $4 each and the tags are $.75), but it’s SO worth it.
Some hats were made just to be made, while others were crafted with a specific person in mind. Sarah likes black, no pom-pom – Brianne likes gray – and Britt would look adorable in a floppy beret. The hats sit piled on my countertop, patiently waiting until they’re ready to be given away and it brings me SO. MUCH. JOY.
Now if you’ll excuse me, I’m off to pick up some more yarn with my 25% off coupon from Michael’s.
If you’re like me, you’ve probably seen the chunky knits and pom-pom hats that are E-V-E-R-Y-W-H-E-R-E. J.Crew, Burbery, L.L. Bean, American Eagle, Loft, etc. etc. As a hooker, I’m obsessed. They’re the perfect blend of warm texture and a little playful fun!
Of course, there’s no integrity in purchasing one from a big-box store, so I decided to knit my own.
While running errands on Wednesday, I found myself in Michael’s (I swear I don’t know how that always happens!). I started perusing the yarn aisle even though, you know, I don’t need anything. The deals were too good, the skeins were too cozy.
I let my guard down and envisioned a weekend of chunky cables and pom-poms. So I bought 22 skeins of yarn and 16 pom-poms. Oh the shame!
(Fun note: the fuzzy pom-poms are actually keychains that are attached to the metal with a small elastic band. A little prying apart of the attachments and I had a simple way to sew onto the hats using the elastic loop.)
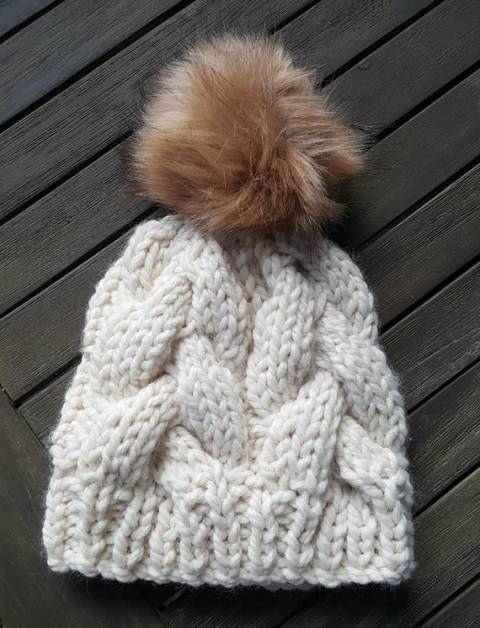
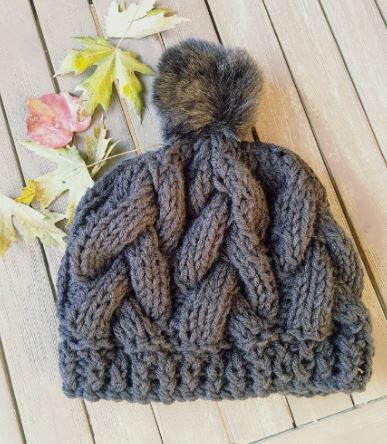
I’ve worked up 4 hats yesterday and this morning: two cable knit black hats, one cream and another crocheted maroon one. The black and cream ones are based off a pattern from Premknits, the Braided Cable Beanie Pattern ($4.99).
I hate (hate!) knitting in the round (the tubes always twist and turn on me) so I modified the pattern so I could knit on my ever-trusty straights. After following most of the pattern for two hats, I decided to scale it down to only 5 cables instead of 6 and I like how that looks. Less yarn, less time, less bulk.
The crocheted maroon hat was a pattern I made up as I went along and didn’t write down. I can if there’s interest! It takes some time since you have to go back and work slip stitches onto some stitches after you finish to give those 5 rounds their lines of texture.
I love how these knit pom-pom hats are turning out! It’s fun to experiment and see how each one is a little different.
I plan on gifting a few as Christmas gifts since they work up quickly and everyone loves a good hat. Might also be on the hunt for some new pom-poms, but TBD, it’s going to take me some time to use up the other dozen…
After eating Thanksgiving left-overs for dinner, it’s time to decorate my apartment for Christmas! Carols are playing, crochet hooks are out, my balsam candle is lit and a glass of merlot is poured.
I found this great star pattern from Persia Lou and knew it’d be the perfect accompaniment to the minimalistic Christmas decorations on my bar cart. The stars were festive, they were crocheted, they were PERFECT.
I followed Alexis’ instructions exactly, minus the blocking since there’s no time for that when you’re too excited. If you look closely, you’ll spot my crochet hook on the bar cart – I told you there was no time for formalities – I wanted to see how this looked hung up!
Because I skipped the blocking, the stars do look more like flowers with rounded instead of pointy petals so I might make some DIY blocking liquid (equal parts glue + water), but TBD on that.
I made 5 stars using cream Vanna’s choice worsted weight yarn and joined them together with a chain of burlap string I had left over from another craft project. For the burlap cord, I used a K hook (same as for the stars) and did 13 chains between each star, joining as I went.
Materials
30 yards Vanna’s Choice yarn
Size K crochet hook
5 yards Burlap cord – I used some from Ms. Sparkle & Co.
I love how it turned out. So festive! So fun! If you’re looking for a quick, easy crochet project to make your house look festive this Christmas, I highly recommend this pattern by Alexis at Persia Lou. https://persialou.com/2015/12/crochet-star-ornaments-free-pattern.html
I could see the crochet stars being great as tree ornaments, light switch hangers or laid down on a counter top – really anywhere you need some extra cheer!
Looking for an easy, uncomplicated men’s crochet hat pattern? Something that’s good for a beginner? Search no more!
I’ve written out the pattern and avoided crochet abbreviations so you know exactly what to do. Sized for a man, but will also fit women’s heads, too.
This simple men’s crochet hat pattern is easy. No frills, no weird stitches, just a tried and true shape that’s guaranteed to fit the guy in your life. Make one for your brother, you hubby, your friend or mailman. Side note: I have curly, thick hair which means I need a bigger hat. This hat fit my head so don’t let the “men’s” part of the title scare you away – this would be just as good for a women as a guy!
All you need to know is how to make a double crochet, single crochet, chain stitch and slip stitch.
Chain 3, slip stitch into first chain to form loop.
Round 1: Chain 2 (counts as first double crochet now and throughout). Work 12 more double crochet into ring. Slip stitch into top of chain 2 to join into a circle. (13 double crochet total).
Round 2: Work 2 double crochet into each stitch around. Join with slip stitch to top of chain 2. (26 double crochet total).
<<Stop and measure work to check your gauge! Laid flat, circle should measure just under 3.25 inches across. If smaller or larger, adjust your hook size or yarn.>>
Round 3: Work 2 double crochet into first stitch, 1 dc into the next stitch. Repeat pattern of *2 1 2 1 double crochets* around. Join with slip stitch to top of chain 2. (39 double crochet total).
Round 4: Work 2 double crochet into first stitch. 1 dc into each of the next 7 stitches. Repeat pattern of *2 double crochet…. 7 double crochets into next 7 stitches…. 2 double crochet into the next stitch* around. It’s ok if you don’t end perfectly. Join with slip stitch to top of chain 2. (46 or 47 double crochet).
Rounds 5 – 13: Double crochet into each stitch around. (46 or 47 double crochet).
Round 14: Chain 1 (counts as first single crochet). Single crochet in each stitch around. Slip stitch to top of chain 1 to join. Fasten off. (46 or 47 double crochet).
You did it! This pattern is basic and simple enough that you can customize to your liking. You can add a stripe in of a different color for Round 11. Or maybe you’d like to make a fold-up brim? Simple repeat Round 5 a couple more times and your hat will be longer so you can fold up the ends.
I’d love to hear if you make your very own men’s hat for someone. Leave a comment below!
Knitting and crocheting are similar, yet different.
Both crafts use yarn to make items, but knitting is done with two knitting needles and the stitches are loops. Crocheting, on the other hand, is done with just one crochet hook and the stitches resemble small knots.
The resulting projects look different, too.
Knitting can be easier to learn because only two stitches are used: the knit stitch and purl stitch. It’s a very logical craft – knitters move stitches from one needle to the other, then back again. The loops remain on the needles which makes for very organized projects. Stitches look like straight lines or little V’s.
Crochet stitches build from each other and range from very short and small (chain stitch) to very tall and twisty (triple crochet). In between are other stitches, the most common crochet stitches being the single crochet and double crochet. Stitches are bumpier and more textured.
Knitting is great for items that need delicate stitches such as soft sweaters or fluffy cowls. Crocheting is perfect for when bulkier stitches are needed – hats, scarves or dishtowels.
You’ll also notice there is a bit of a stigma sometimes associated with crocheters. The more traditional of the two is knitting. Think of the old pamphlets published with instructions on how to make a sweater for the wintery coasts in the UK. Chances are, those patterns are for knitted cardigans.
Knitting is your craft if you:
Have patience – Knitting projects can take more time and be more detailed (the stitches are also smaller!)
Want to save money (but only to buy expensive yarn). Crochet projects, believe it or not, take a third more yarn
Prefer logical projects and directions
Want to enjoy an extensive library of patterns – knitting patterns can be more popular and more readily available than crochet patterns
What you’ll need: yarn + knitting needles (size 11 for beginners)
Crochet is your craft if:
Quick projects excite you (bigger stitches = projects work up faster)
You aren’t afraid of making mistakes – it’s easier to rip out work or fix a mixed stitch
Your mind works spatially – you like going up, down and around or over
You’re creative – crochet patterns can be scarcer to find and you might have to forge your own path
What you’ll need: “normal sized” yarn called worsted weight + a crochet needle (size H is good for beginners)
I learned to crochet when I was 8 so it’s my first love and I’m obviously biased, but knitting is a close second. If you’re adventurous, I’d recommend trying both crafts and seeing what you like.
I’ve taught both crafts to friends and it seems to be an individual basis of what is easier or harder – some people hate the structured stitches of knitting, while others find crocheting too cumbersome and need boundaries.
If I had to recommend just one, I’d recommend knitting since it tends to be easier for people to pick up quickly.
Advanced crafters may have some level of knowledge between crocheting and knitting and can easily add a crocheted border around a knit cardigan, for example. Learning both will enable you to be more versatile and choose whichever you’re in the mood for (and which one best suits your project needs).
Either way, you can’t go wrong! Which one have you tried?
For 8 reasons why crochet is better than knitting, read here.
THE most random experience of my life began a few months back on November 23, 2015. A few days before Thanksgiving, I received this email:
I work on the Casting Team at Condé Nast Entertainment, which is the digital arm of all of the Condé Nast brands (GQ, Wired, Vogue, Glamour, etc). Condé Nast Entertainment is producing a cool video for The Scene and is looking for people who can do things impressively and incredibly fast with their hands. This will likely shoot at our studio in downtown Manhattan.
We would love to have you casted in our video for Speed Crocheting.
Initial thoughts:
Speed crrocheting? Yes please.
This could be fake.
NYC? How cool!
Wait, how did they find me?
I reeeeeally hope this isn’t fake and/or an elaborate plot to kidnap me.
So I replied and chatted with the recruiter. They wanted to plan something for December. Didn’t hear details so sent a follow-up email cause if there was speed crocheting happening, you’d better believe I wanted to be a part of it.
Silence.
Then in February, things got real.
They sent a few dates when other fast-fingered-friends (a Yo-Yo guy, fast clapper and a fast pizza maker) would be filming in NYC and asked which date would be best. March 4th, 2016. It was settled. They booked me a flight, sent me a hotel reservation and told me they’d see me in a few.
People have asked how they found me and I don’t know. If I had to guess, I’d say they saw this 5 year old video of me speed crocheting and thought I’d do. (I laugh thinking how I do SEO for a Fortune 500 company so it’s literally my job to optimize content; the other three speed crocheters never stood a chance.)
Leading up to my departure, I FaceTimed with the Producer and his assistant, Jeff and Joe, and they asked what I could make in about 2 minutes. They suggested a coaster or a circle. I said, “How about a flower?” Their reactions were the most excited I’d ever seen two men get about crocheting. “A FLOWER?!” Uh yeah, sure, I told them, 2 mins is enough time to make a flower.
A flower it would be.
I got a call from Marco, the prop guy, and we talked about colors of yarn and what he could buy. I asked what I should wear. He said there was no wardrobe guy. Fair enough, Marco, my hands will be the main focus. I told him I’d get a manicure instead of a new outfit and awkwardly laughed.
The filming was on Friday at 2pm so I arrived Thursday night. I had Friday morning in midtown to myself and couldn’t be more excited to explore the city alone. (My sister was planning to come, but with the short notice, I couldn’t convince her to buy a $550 plane ticket.)
Friday morning, I woke up at 6am, walked .75 miles to Times Square to watch Good Morning America film. I met Robin Roberts when she came to greet the fans. Hearing I was from Pittsburgh, she responded, “WTAE!!!” Heck yes, Robin – WTAE!!
I then picked up $17 tickets to see Les Mis (thanks to my friends at GMA who gave me the tip on Broadway for Broke people and cheap same-day tickets), treated myself to brunch of eggs benny (my fav), and headed off to Conde Naste’s studios.
I got lost trying to take the subway there, but they’re right next to the World Trade Center Memorial. I went up, saw the studio, met a bunch of people and they told me to stand behind a table and crochet while they shot aerially.
Um, I don’t crochet standing up. That’s crazy.
So they got me a chair and I repositioned myself. But to be honest, it still wasn’t great. As any crocheter will attest, when you crochet your elbows rest almost at your hips, hands at about mid-stomach level. Normal. To get a shot, they had me stretch out my hands so they were centered over a table. Elbows on the table.
Imagine telling a basketball player they had to shoot free throws sitting down at the foul line. Same thing. Possible, but awkward. It was strange and I’ll admit didn’t set me up to do my best. I was dropping stitches and wasn’t as fast as I’d been practicing.
It was still great, though, and the camera man said my skill was the one he was most excited to see.
After 8 or so takes of crocheting in a silent studio of 10 men watching, it was a wrap. They did one final take with just sound to get the sound of the yarn scratching over my hook. Marco the prop guy fed me the yarn as I was crocheting so it looked like the yarn was almost appearing out of nowhere. So fancy!
Conde Naste paid me $200/hour, said thanks and I left.
And here it is!! My 1 minute, 43 seconds of fame. Enjoy.
After filming, I made my way (yarn and hooks in tow like a bag lady) to McSorely’s, the oldest Irish pub in NYC (thanks for the recco, boss). I sat down, ordered light beer–you’re given a choice between light and dark–and also got the fish ‘n chips.
I’m fine traveling and eating by myself and was enjoying the atmosphere.
Before my meal arrived, an elderly gentleman wandered over and sat down. I heard his life story. Turns out, he was an 86 year old actor and we joked about him being old, his kids never visiting and his wife who attends two Broadway shows a week. God bless NYC.
I spent the rest of the weekend putzing around NYC doing touristy stuff. Stayed in Times Square, read in Central Park. Took selfies at the MoMa, devoured Shake Shack and muddied my way through the subway. It was a fantastically relaxing weekend. I even got to see an old friend, Sam, though we took zero pictures to prove it.
Overall, one of the most bizarre, thrilling moments of my life. I told my mom this trip was a clear picture of how God blesses us. This trip served no purpose besides bringing me joy. I wasn’t saving lives, I was crocheting. A talent God gave me and led me to discover when I was 8 years old. It’s as though He thought up something that I would LOVE and made it happen–just for the fun of it.
Crocheting has marked many seasons of my life.
I remember dealing with death when my crocheter teacher lost her battle with cancer four months after we had our first lesson. I remember recovering from scoliosis surgery when I was 14 and crocheting while learning to walk again. I think back to long drives I made in college to go to craft shows. I remember moving yarn to each new home. I think of the conversations I’ve had with The Knotty Knitters. God’s given me so many good, sweet moments in life and some of the big ones have been marked by this simple hook-and-needle craft.
Thankful I can add this crochet weekend in NYC as another reminder in my life of God’s faithfulness.
Emerson said, “life is a journey, not a destination.” When I heard about cross-country train trips, I knew I had to go. My dad, mom, sister and I spent three vacation days taking an Amtrak train across the US (well, almost).
The quick review is GO. The train is a romantic way of travel, the views are incredible. Just prepare yourself for it to be a little hobo. If you’re ok going with the flow of things and making your own rules, it is a fantastic relaxing vacation.
Plus, you’ll forever be able to tell your friends, “oh yeah – this one time when I took a train cross-country… it was awesome.”
The Planning
It began by telling my dad plans to take a solo train trip from Pittsburgh to San Francisco on the California Zephyr and evolved into a week-long family ski trip (don’t ask me how – it escalated very quickly and included an atlas). Rather than ride the track the entire way to San Francisco, we decided to hop off in Utah to ski. I wanted to experience the magic of train travel; my family was mostly interested in the travel after the train.
Amtrak’s California Zephyr officially runs from Chicago to San Francisco. A one-way coach ticket will cost you about $200, while a ticket for a sleeper car costs double that, though does have meals included. Amtrak’s website can be tricky to navigate – you don’t buy a “Zephyr ticket”, but simply input your departure and arrival stations (train speak!) and it’ll calculate the cost.
We found it was only $10 more to include the leg from Pittsburgh to Chicago so we purchased Amtrak tickets from Pittsburgh, PA to Provo, Utah. We opted to get off at Provo for two reasons: it has fantastic skiing and it let us ride through the majority of the Rockies (thanks, atlas).
Our 2,000 mile trip included a daunting 43 hours of train travel from start to finish (9 hours from Pitt to Chicago, with a 5 hour layover, then 34 continuous hours from Chicago to Provo). When my mom convinced my sister to come with us, she mistakenly told her the trip was 28 hours. It wasn’t until day two that she found out it was much longer. Needless to say, she was not happy.
The Trip
We arrived at the Pittsburgh Amtrak station two hours before our train departed since Father Bill likes to be early. I was unprepared for how casual the boarding process was. You wait in an indoor boarding area (similar to an airport gate), then a few minutes before you’re ready to board, you take your bags and walk onto the train platform. Someone scanned our tickets, assigned us four seats, we walked what felt like 5 blocks to a passenger car and were off. Simple as that.
Amtrak wasn’t strict on their carry-on or luggage policy. We had two large suitcases and each had two carry-ons. Again, super casual – you carry on your luggage, stow on the bottom car, then find your seat on the upper level.
We left Pittsburgh at midnight and arrived at Chicago a little after 9:45am. This was poor planning on our part (though the cheapest option) since this meant we essentially slept on the train and didn’t get to do/see anything until we arrived in the Windy City the following morning. Sleeping on a train isn’t bad, but it’s not good. The chairs recline 45 degrees and have two foot rests (the bottom of your seat extends and the other is a bar that pulls down from the chair in front of you). Still, not ideal and my sister and I traded taking shots of Zzzquil to help us sleep. But for $10, it beat having to fly to Chicago. We brought pillows and “train blankets” and settled in for the ride.
I’d been to Chicago years ago and was excited to show my family the city. We only had a 5 hour layover but took advantage of the time. We checked our bags at the station ($18 for 24 hours) then walked from Union Station to Millennium Park to see the iconic Bean. It was freezing out (9 degrees!), but the 1 mile walk was refreshing. Afterwards, we enjoyed deep dish pizza before walking to the oldest library in the city. We explored the historic building, shopped a bit, then Uber’d back to the station.
We barely made it back in time since we got our track number wrong (Track #5, not Train #5!), but thanks to Amtrak’s lax boarding policies, we ran up to the platform, had our tickets scanned, boarded and 10 minutes later, we were on our way out West. Close one. Father Bill was sweating.
The first 20 hours of the second leg weren’t exciting. We headed from Chicago into Iowa, through Nevada and towards Denver. The land we could see for 3 hours until the sunset was flat and uninteresting. After that, it was darkness and a restless night’s sleep until we got to Denver.
The train arrived at the Denver station a little before 8am. My sister and I woke up from our Zzzquil-induced stupor to the train loudspeaker announcing this was a ‘fresh air’ stop. We immediately started mapping a route to the nearest Starbucks.
We arrived in Denver, bounded off the train, asked a man for directions as we jogged out of the station (“You can trust him because he’s wearing Patagonia,” asserted my sister) and found a Starbucks three blocks away. My mother did not support our coffee dreams and said if the train left, we were on our own. We made it back with a few minutes to spare and didn’t even show tickets as we walked around the corner of the train station building and back onto the train. Nothing stands in our way when coffee’s on the line.
Our hop-off, hop-on stunt made me feel a bit like a hobo, but like Michael Bluth says, you’ve got to watch for hop-ons… cause you’ll get hop-ons.
After Denver, the scenery started to get interesting. We immediately began our ascent through the Rockies, going through what someone said were 26 little tunnels as the train slowly increased its altitude. We spotted a large herd of elk in the hills beyond Denver and were enthralled with the beauty of the Rocky Mountains. I don’t know if it was the flatness we endured in Iowa, but I was loving the views. They were incredible. This is the reason you take a cross-country train trip.
My dad and I spent a few hours in the sightseeing car and took in the endless snow-covered mountains. Anna and my mom soon joined. We’d point out mule deer or coyotes as our eyes scanned the breath-taking landscape. At one point, my father turned to me and said, “Thank you for taking me on this trip. It’s incredible.” Those are powerful words coming from an engineer. When trying to get my sister to appreciate the same views, she said “Jayna, I have been looking at the same rocks for the past five hours. I don’t want to look.”
The sun set behind the red hills of Colorado and it was amazing having nothing but mountains surrounding you for miles.
It was close to 11pm when our train halted to a quick stop in Provo, Utah. We said goodbye to our metallic home for the past two and a half days and hailed an Uber. We couldn’t get to our horizontal hotel beds fast enough, no Zzzquil needed.
The Food
Having read a few articles beforehand, we went in with the assumption that train food was unappetizing and expensive, so we packed snacks for our journey. My thoughtful mother brought chocolate (of course), granola bars, nuts, PB&J sandwiches, water and lots of fruit. We had enough food to last us during our two days on the train, but did break down and bought hot dogs ($5) the last little part of the the trip.
The Amenities
Two outlets at each seat
Reclining chairs with plenty of leg room
Sightseeing car, dining car, sleeper cars and coach seating for the paupers
Four bathrooms per coach car
No showers, no wifi, intermittent cell service
Not a luxury ride (we didn’t spring for the sleeper cars), but a lot better than expected. We passed the time talking, sleeping, reading, walking through the sliding train cars and taking in the landscape.
The Consensus
If you’re considering taking an extended Amtrak trip, DO IT. It’s an experience. It’s slow, it’s soothing and it’s unlike any other form of “modern” travel. You’ll adopt a new standard of hygiene (we wore the same clothes for three days) but you’ll get to see the heartland of America.
My friend sent me this horrifying article detailing the perils of Amtak travel the day before we left (thanks, Mel), but we found it to be an overall great experience. Bathrooms weren’t horrible, the ride was relatively smooth and the train people (conductors?) were friendly.
9 out of 10 we’d do it again.
The Final Leg
After saying goodbye to the train, my dad, sister and I skied at Robert Redford’s getaway, Sundance Mountain Resort, and enjoyed the steep hills and notoriously fresh powder of western US skiing. My sister rated it one of the best days of her life.
From there, we drove to Salt Lake City, flew to Denver, rented a car and drove 2 hours to Vail, CO. We stayed at an Air BnB, then skied the following day in Vail (conditions were a little worse than Sundance and the mountain drive treacherous), but when you come that close to Vail, you ski Vail.
Our trip ended in an uneventful drive back to Denver and evening flight to Pittsburgh. My sister expressed her gratitude (multiple times) that we were not taking the train back and I’ll admit it was nice to cover 1,500 miles in 3 hours instead of 40.
Overall, it was an action-packed family vacation. We got to travel through small towns, sweeping mountains and secluded forests. Moral of the story is that if you’re considering taking a cross-country train trip of any length on an Amtrak, GO! One thing that’s certain is you’ll have an adventure.
Whipped this bad boy up this weekend because I wanted a basic men’s hat pattern. You know, for those projects where you want a neutral base. A few years ago, I made this men’s hat and wanted to create something that was sized a bit larger and without the textured band.
Finished hat will fit an adult male: 21.5 inches wide by 7.75 inches tall.
Men’s Crochet Hat Pattern
Materials:
120 yards worsted weight yarn. I used Vanna’s Choice in tan
Size H (5.0mm) crochet hook
**Important: Check gauge and either use thicker yarn or a larger crochet hook. After Round 2, hat should measure 3 inches in diameter**
Chain 3, join with sl st to form ring.
Round 1: Ch 2 (counts as first DC. Work Ch 2 at the beginning of every round in place of first DC). Work 14 more DC into ring (15 stitches). Join with sl st, do not turn.
Round 2: 2 DC into each stitch around (30 stitches). Measure gauge. Hat should measure 3 inches. Join with sl st, do not turn.
Round 3: 1 DC into first stitch. 2 DC into second stitch. Continue pattern of *1 DC, 2 DC* around (45 stitches). Join with sl st, do not turn.
Round 4: 1 DC into each of next 4 stitches. 2 DC into fifth stitch. Continue pattern of *1 DC into next 5 stitches, 2 DC into next stitch* around (54 stitches). Join with sl st, do not turn.
Round 5: 1 DC into each stitch (54 stitches). Join with sl st, do not turn.
Round 6: 1 DC into each of next 7 stitches. 2 DC into next stitch. Continue pattern of *1 DC into next 7 stitches, 2 DC into next stitch* around (63 stitches). Join with sl st, do not turn.
Rounds 7 – 13: 1 DC into each stitch (63 stitches). Join with sl st, do not turn.
Round 14: SC into each stitch. (63 stitches). Join with sl st. Fasten off. Weave in end.